A series of looks using the E.L.F. Brightening Eye Colour Quads:
3. Ivy
www.eyeslipsface.co.uk
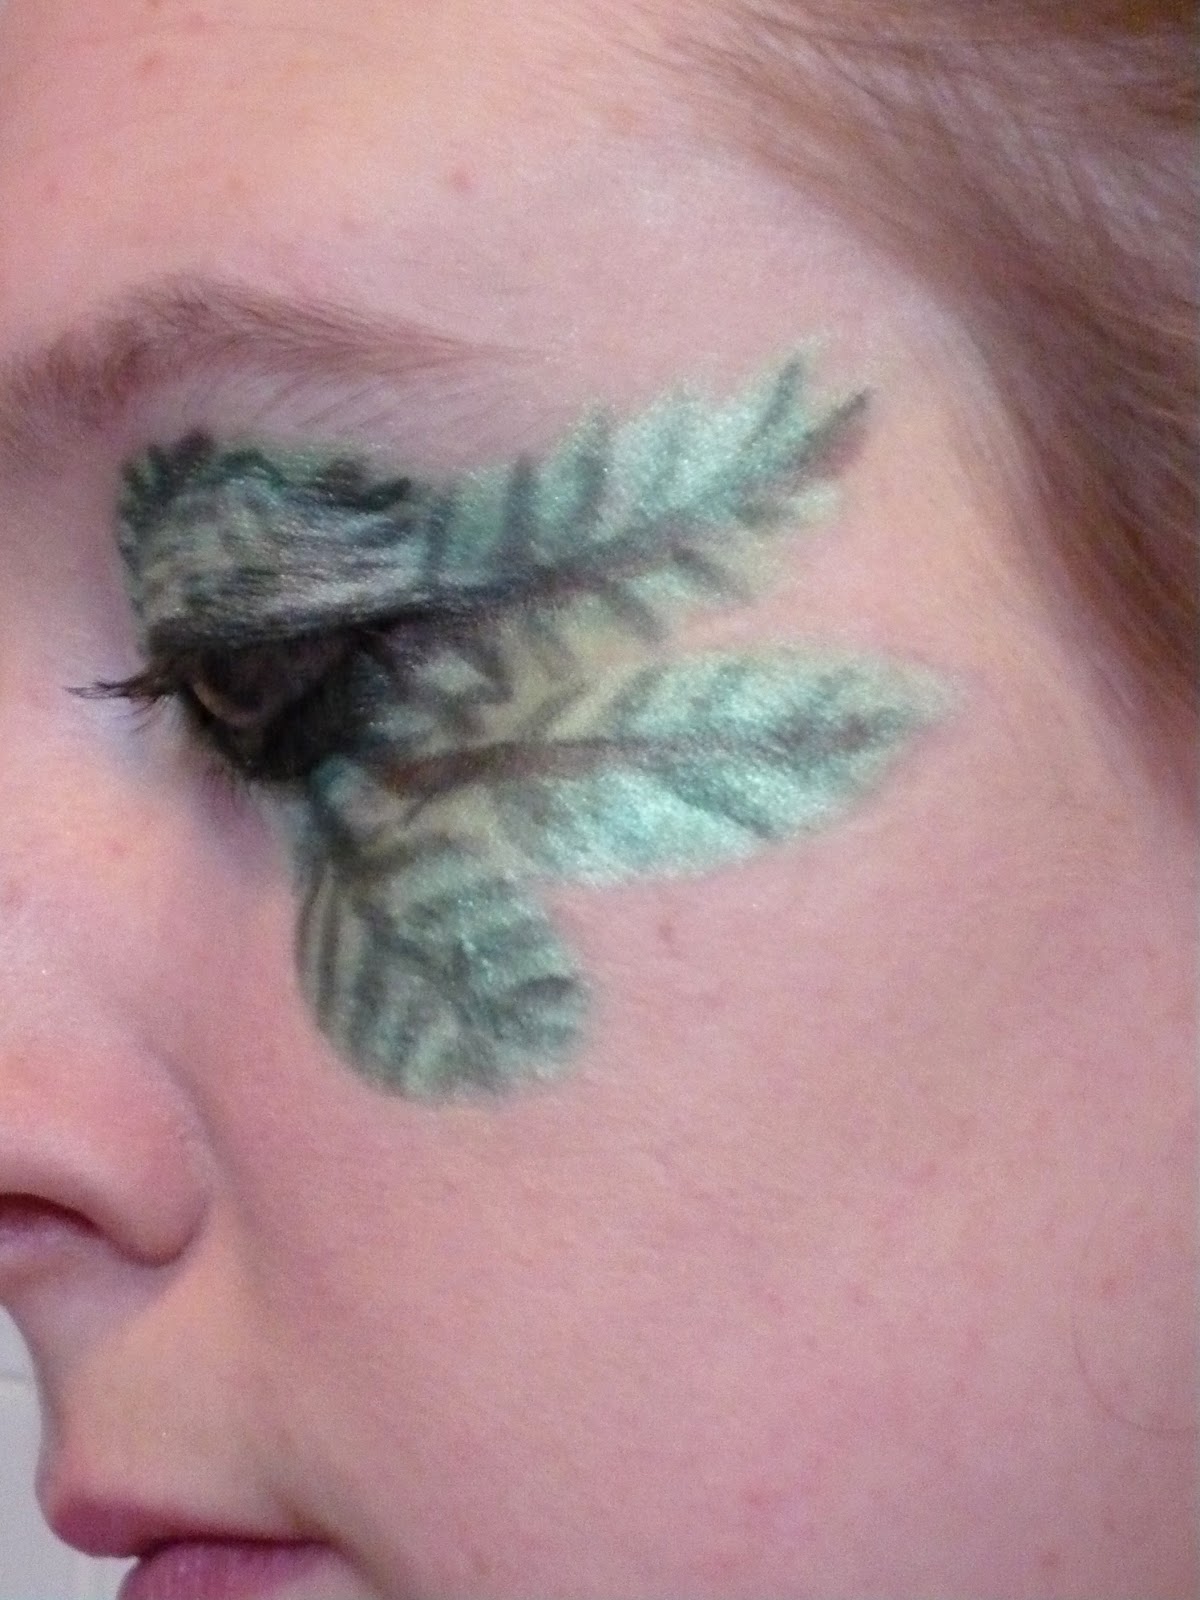
I was really inspired by the name of this quad. I immediately thought of Poison Ivy from Batman.
With Superheroes in mind, I decided to create a mask, one which only covers they eyes and incorporates leaves, this is what I came up with during my makeup play:


To create this bit of fun you will need:
The e.l.f. brightening eye colour quad in Ivy
 |
| The e.l.f. brightening eye colour quad in Ivy |
A primer; I used e.l.f. Mineral Eyeshadow Primer

A waxy pencil as a colour base; I used NYX Jumbo Eyeshadow Pencil in Horse Raddish (not pictured)
Brushes; I used e.l.f. Studio Eyeshadow C Brush, e.l.f. Studio Small Angled Brush, e.l.f. Studio Small Precision Brush


A Mascara; I used e.l.f. Mineral Infused Mascara

Step 2. Cover Lid and under eye with the colour base of your choice
Step 3. Draw the outline of 3 leaves, one on top of the other and fill in with the colour base
Step 4. Place the lightest green eyeshadow over the colour base using a flat eyeshadow brush to pack on the colour
Step 5. Line the eyes with the darkest brown shade.
Step 6. Create a long and extended wing using the darkest green shade and an angled brush. Use this as the steam of the first leaf.
Step 7. Using the same colour and brush create veins leading off from the main stem.
Step 8. From the middle of the lower lash line, extend another line down and across the center of the second/middle leaf.
Step 9. Again draw veins leading off from this central stem.
Step 10. From the inner corner of the lower lash line, run another line across and down the center of the 3rd/bottom leaf shape you have drawn remembering to give it veins as well.
Step 11. Accent the main stem of each leaf with the brown you used to line your eyes.
Step 12. Over the lid the colour base and palest green shadow should be a little way up and over the crease.
Step 13. From the inner corner, curving along the natural shape of your lid (see pictures) create a line, again using the darkest green and an angled brush.
Step 14. Create another line starting from the middle of your upper lash line curving in the opposite direction.
Step 15. Draw tiny veins off of these lines (this is very fiddly, take your time, try not to make these lines too thick)
Step 16. Apply Mascara


Ta daaaaaaaa!
Gina xxx
No comments:
Post a Comment